Showing posts with label Recipes. Show all posts

Friday, October 8, 2010

Homemade Applesauce in the Crock Pot

I have been in the mood to make homemade applesauce, ever since Ryan's teacher made it in class for Johnny Appleseed Day a few weeks ago!  She added a box of red hots to the apples, but my kids don't really like cinnamon in their applesauce, so I went by this recipe below.  Have I mentioned how much I love my old Crock Pot?  It is the best device ever!  You can freeze this in freezer bags, or cook it longer and make apple butter to can!  I think I will try that next.


Homemade Applesauce

8 medium-sized Gala apples, peeled, cored, quartered, and sliced
1/4 cup brown sugar
1 tsp ground cinnamon (optional)
1/4 cup water or apple juice

Place all of the apple pieces in a large bowl and stir in sugar and ground cinnamon. Pour water or apple juice into the bottom of a large crockpot (slow cooker) and add the apple mixture. Cover, turn the crockpot setting to Low, and cook for about 8 hours (or on High for 5 hours), stirring occasionally.  Blend until smooth or mash for a more chunky type of sauce.  Serve warm or room temperature.

Makes approximately 4 cups of applesauce.

Saturday, July 31, 2010

Turtle Brownies

Last night we got together with some old friends that were in town and I was bringing dessert.  I had a brownie mix in the pantry, but wanted to spruce them up a bit.  I had some caramels in a bag and decided to use those and searched for a recipe for Turtle Brownies and this is what I ended up using.  They were VERY good - nice and moist, really, but did NOT look like the picture at all!  The above picture is from the Betty Crocker website where I got the recipe.  Mine did not have that beautiful layer of caramel.  Instead, it just baked into the brownie layers with no distinguishable difference of layers, at all.  Still very good, and I would make it again!

Turtle Brownies (from the Betty Crocker website)

1 box (1 lb 2.4 oz) Betty Crocker® Original Supreme Premium brownie mix
Water, vegetable oil and eggs called for on brownie mix box
36 caramels, unwrapped (from 14 oz bag)
3 tablespoons whipping cream (I used half and half)
1 1/3 cups semisweet chocolate chunks (from 11.5 oz bag) (I used mini chips, what I had on hand)
2/3 cup coarsely chopped pecans

1. Heat oven to 350°F (325°F for dark or nonstick pan). Spray bottom and sides 9-inch square pan with baking spray with flour. Make brownie batter as directed on box. Spread 1/2 of batter in pan. Bake 18 minutes.

2. Meanwhile, in large microwavable bowl, microwave caramels and whipping cream uncovered on High 2 to 3 minutes, stirring occasionally, until smooth.

3. Pour caramel over partially baked brownie; spread to within 1/4 inch of edges. Sprinkle with 2/3 cup of the chocolate chunks and 1/3 cup of the pecans. Drop remaining brownie batter by small spoonfuls onto caramel layer. Sprinkle with remaining 2/3 cup chocolate chunks and 1/3 cup pecans.

4. Bake 34 to 37 minutes longer or until center is almost set. Cool 1 hour at room temperature. Cover; refrigerate 1 hour before serving. For brownies, cut into 6 rows by 4 rows. Store covered at room temperature.

Tuesday, July 27, 2010

Homemade Granola


Last night I made some homemade granola for breakfasts and snacks during the week.  I tasted it before I put it in the oven, and new it was a winner!  I got this recipe from Polly on her blog and website.   
Here is the recipe:

Homemade Granola

2 1/2 cups old fashioned oats
1 c. slivered almonds (raw, not roasted yet!)
1/2 c. unsweetened coconut
1/2 c. maple syrup
1/4 c. canola oil
1 tsp. cinnamon
1 tsp. pumpkin pie spice
1 tsp. vanilla

Mix all together by hand. Spread onto cookie sheet and bake at 325* til golden brown, stirring often approx. 30 minutes.  Cool on waxed paper and store in an airtight container.


Warning -- this is SO good you may eat it all in one day!  I love it on top of vanilla yogurt, or whatever flavor I have on hand.  SO yummy!

Check these places out for more great ideas!

Today's Creative Blog
Sumo's Sweet Stuff
Hope Studios
Someday Crafts

Tuesday, July 20, 2010

Blueberry Jam

I wish I could say I grew these berries myself or picked them from a farm, but I did not.  Just bought them from my local grocery store.  When the summer berries are at a good price, get them!
Wash and destem all of your blueberries.  I also run my hand around in them and "feel" for any overly soft and mushy ones, and remove those. 
Make sure you get everything out and ready.  Sterilize your jars, simmer your lids, have the sugar ready to pour at once, and get your pots and pans out. 
Do you see this pan??? THIS is the LOVE of my life, when it comes to large dutch oven pans!! My husband should be VERY jealous! It isn't a LeCreuset, but a Martha Stewart HEAVY enamelled cast iron dutch oven!  My husband bought me this from Macy's last Christmas, and I almost forgot I had it when i was making all of my jams.  So see, he shouldn't be jealous over this enamelled beauty since he bought it for me! It cleans up SO nice, and looks perfect when you are done, just like it was new.  Love-Love!!!!
Bring your mashed fruit and pectin to a rolling boil.  Then add your sugar, all at once.  Return to a rolling boil for 1 minute, and ladle your fruit goodness into sterilized jelly jars.  Put on the two-part lid, screw on the jar rings but not too tight, and return it to a boiling water bath for 10 minutes.  After the 10 minute canning, take them out and let them alone on the counter.  You will here the lids "ping", which is a good thing!  After 24 hours, take off the rings ONLY, use your finger to try to lift up the top lid.  If it comes up, it didn't take, and you will have to either put that jar in the freezer, give it away, or put it in the fridge to eat for later!  Sometimes they don't all can, but this time all of my blueberry jams did.
Here they are, all done!  I also rewipe the jars, because there tends to be some stickiness around the treads of the jars, even after canning.  Make some pretty labels and you are done!  Here is the blueberry jam recipe:

Blueberry Jam

4 cups prepared fruit (buy about 4 pt. fully ripe blueberries)
1 Tbl. lemon juice
1 box of SureJell Pectin
6 cups sugar, measured into separate bowl

BRING boiling-water canner, half full with water, to simmer. Wash jars and screw bands in hot soapy water; rinse with warm water. Simmer and do not boil the flat lids and screw bands in a saucepan. Let stand in hot water until ready to use. Drain well before filling.

CRUSH blueberries thoroughly, 1 layer at a time. Measure exactly 4 cups prepared fruit into 6- or 8-qt. saucepot. Stir in lemon juice and pectin. Bring mixture to full rolling boil (a boil that doesn't stop bubbling when stirred) on high heat, stirring constantly. Stir in sugar. Return to full rolling boil and boil exactly 1 min., stirring constantly. Remove from heat. Skim off any foam with metal spoon.

LADLE immediately into prepared jars, filling to within 1/8 inch of tops. Wipe jar rims and threads. Cover with 2-piece lids. Screw bands tightly. Place jars on elevated rack in canner. Lower rack into canner. (Water must cover jars by 1 to 2 inches. Add boiling water, if necessary.) Cover; bring water to gentle boil. Process 10 min. Remove jars and place upright on towel to cool completely. After jars cool, check seals by pressing middle of lid with finger. (If lid springs back, lid is not sealed and refrigeration is necessary.)

I am linking up here:


Thursday, July 8, 2010

More Jam - Strawberry and Triple Berry Jam

After trying my first attempt at making blackberry jam, I decided to venture on to Strawberry and Triple Berry jams.  I ended up getting fruit at the market, but it would be much better if you could grow your own.  That is something I will have to look into next year, because I am WAY past the planting stage right now!  But taking advantage of all of the wonderful summer fruits, I am able to get some gifts together for Christmas, etc.  And canning is surprisingly very satisfying!

Strawberry Jam (Recipe from allrecipes.com)

2 pounds fresh strawberries, hulled
4 cups white sugar
1/4 cup lemon juice

1. In a wide bowl, crush strawberries in batches until you have 4 cups of mashed berry. In a heavy bottomed saucepan, mix together the strawberries, sugar, and lemon juice. Stir over low heat until the sugar is dissolved. Increase heat to high, and bring the mixture to a full rolling boil. Boil, stirring often, until the mixture reaches 220 degrees F (105 degrees C). Transfer to hot sterile jars, leaving 1/4 to 1/2 inch headspace, and seal. Process in a water bath for 10 minutes. If the jam is going to be eaten right away, don't bother with processing, and just refrigerate.


Triple Berry Jam (Recipe from Tasty Kitchen)

•2-½ cups Strawberries, Hulled
•1-½ cup Raspberries
•1 cup Blackberries
•2 Tablespoons Lemon Juice
•1 box Pectin
•7 cups Sugar

Preparation Instructions

Have your jars sterilized and waiting for you in a large canning pot, sitting in simmering water. Make sure that the water covers them by an inch or two. Have you lids waiting in a seperate warm water bath.

Crush berries one layer at a time with a potato masher, and put into a 5 to 6 qt. saucepan. Dump in the lemon juice. Measure the sugar in a separate bowl and set aside.

Stir the pectin into the fruit and bring to a full boil. Quickly stir in the sugar all at once and return to a full boil. Boil for 1 minute.

Take off the heat, and skim off the foam with a metal spoon. Ladle quickly into hot sterile jar, leaving 1/8″ head space. Clean rims and threads, put a lid on it (har de har har), fasten rings, and hand-tighten them. Immediately return each jar to the hot water bath as you fill it.

Once your water bath is full (do not stack jars), pump up the heat. Once it is at a full boil, let it boil for 10 minutes, turn off the heat, and let it rest in the hot water for an additional 5 minutes. Remove and place in a draft-free area to set. If they do not seal, follow normal canning procedures with the defective jars, i.e. try to re-lid, and repeat the water bath OR, if it’s just a jar or two, be a piggo and stick it in your fridge once it’s cool, just making sure to use it within a week or so.

Here are some links to follow:

Hope Studios
Join us Saturdays at tatertotsandjello.com for the weekend wrap up party!

Tuesday, June 29, 2010

Jammin' Time! Blackberry Jam!

This is the time of year when berries are at their fullest, so what better time to make some jam?  My two favorites are Blackberry and Strawberry, so that is what I made.  I was inspired by our grocery store believe it or not!  The blackberries were SO beautiful, I bought two packs of them to make the jam. We don't have any u-pick places or blackberry bushes, so that was the way to go!  These will make great gifts when Christmas comes around!
The recipe I used was from CDKitchens.  I didn't have a canner, so I used the biggest pot I had to boil and process the jars, which was my Pasta Pan...and it worked!  I boiled my jars in it for 10 minutes, and simmered the bands and lids in another pan for around 10 minutes.
I used these half-pint jelly jars with the pretty silver lids and bands.

I tried to strain out the seeds, but that didn't quite work.  Oh well, I will try a larger strainer next time!

Blackberry Jam

3 cups crushed blackberries
1/2 package powdered pectin
4 1/4 cups sugar

Put measured crushed berries in a pot. Add pectin and stir well. Place on high heat and stir constantly bringing quickly to a full boil with bubbles over the entire surface. Add sugar, continue stirring and heat again to a full bubbling boil. Boil hard for 1 minute, stirring constantly. Remove from heat and skim. Fill and seal containers. Process 5 minutes in boiling water bath.

Note: I have scaled this recipe to serve/make 6 half pints, so this is a half recipe and I ended up getting 5 half-pint jars of jam (originally serves/makes 12 half pints). Please adjust for pan sizes, cooking times, measurements in the directions, and divided ingredients accordingly.

This recipe from CDKitchen for Blackberry Jam serves/makes 6 half pints

Here are some fun links to visit, to see what others are doing!
Today's Creative Blog
New Nostalgia
Hope Studios
The Girl Creative

Tuesday, June 22, 2010

Vegan Microwave Popcorn in a bag!

A Dairy-Free microwave popcorn recipe that is easy, inexpensive, and quick!

1/4 cup of popcorn kernals
1 tsp. oil
1/2 tsp. salt
Mix all in a large size brown paper bag.  Microwave on high for around 2 minutes, or until 5 seconds lapses between pops.  I just used the POPCORN button on my microwave.
Be careful opening the bag, with all of the steam excaping

Here is a picture of my helper!
Eat and enjoy!!
For those of us who can enjoy butter, feel free to use melted butter or spray butter before adding grated parmesan cheese or extra salt!

Please check out these sites to get some other yummy ideas:

Today's Creative Blog
Tatertots and Jello
The Girl Creative
Hope Studios
Sugar Bee Craft Edition
Someday Crafts

Tuesday, June 1, 2010

Memorial Day Weekend and a Macaroni Salad Recipe

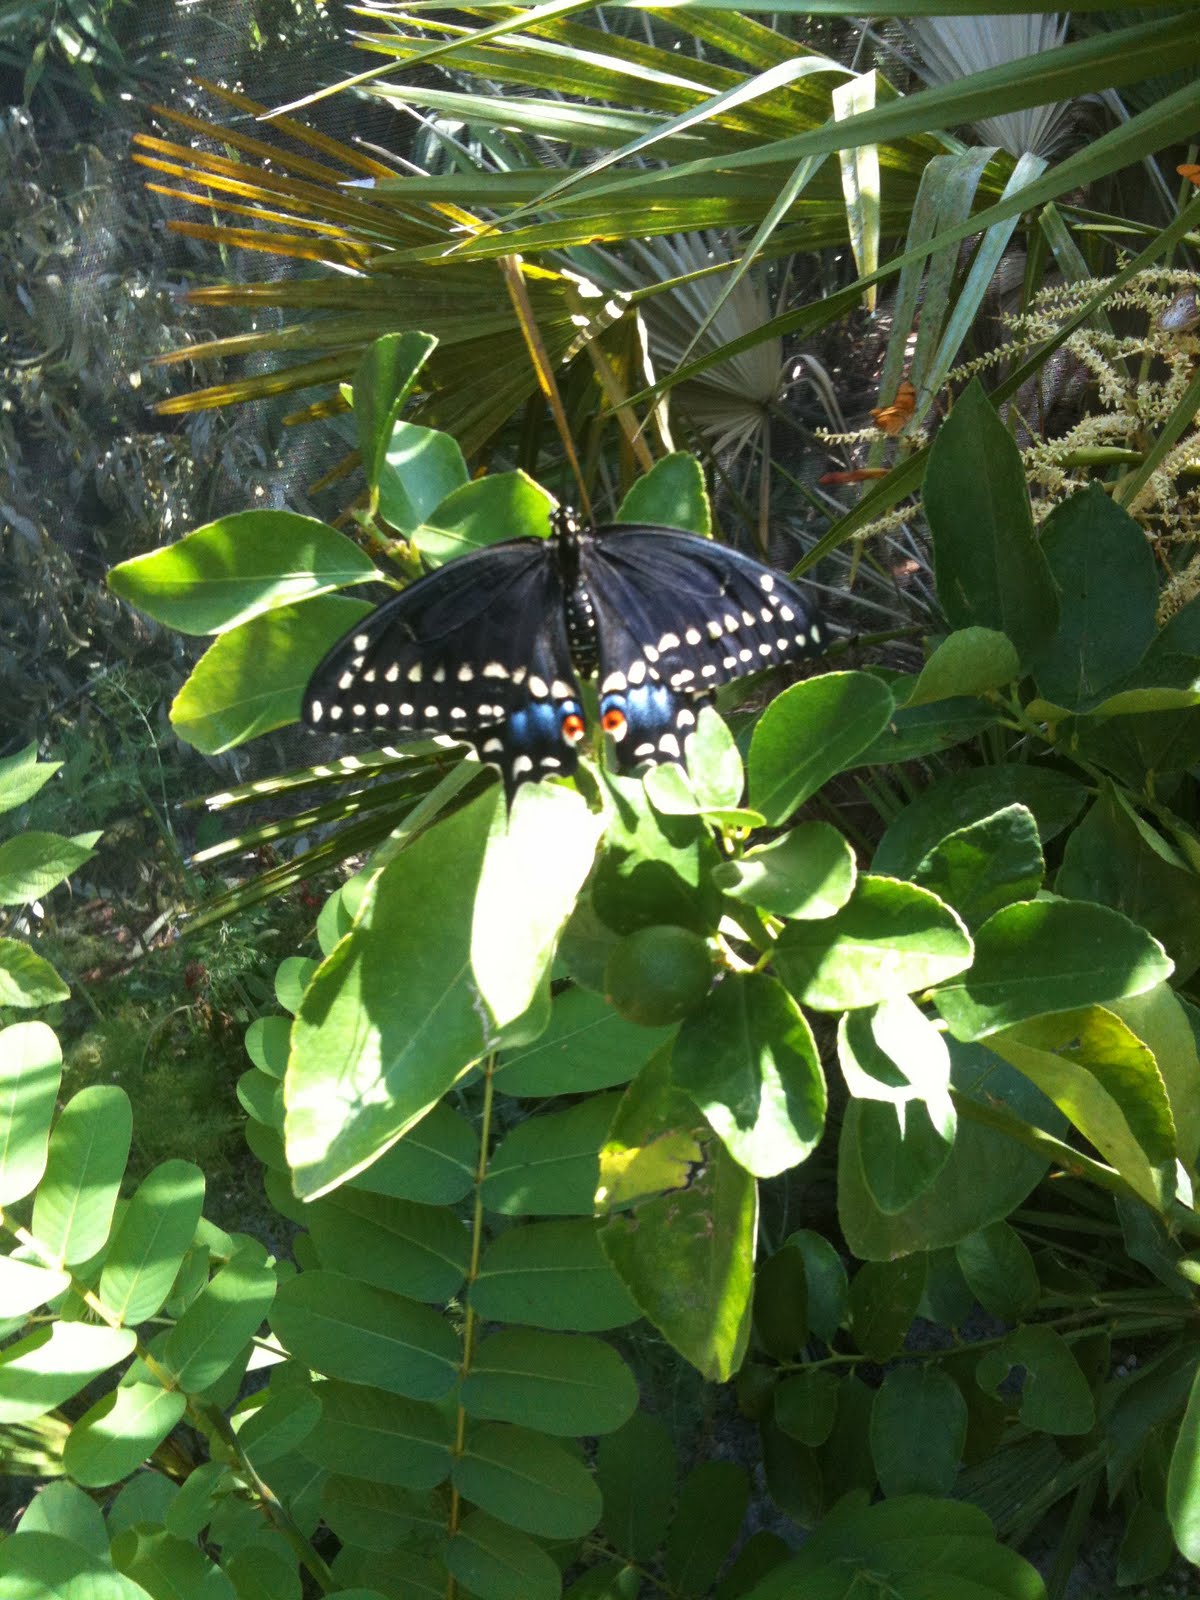
This weekend, we had a FUN 3 day weekend since NASA was closed for Memorial Day.  On Saturday, I took Ryan to the zoo.  We always have a great time there, and this time they have the new Butterflies exhibit open until later next month!  We always see the big Python, the Cheetahs, the Rhino and try to feed the giraffes if they are in.  This time the giraffes were no where to be seen.  Little Man LOVES to play on the big two story fort in the Paws-On area, but that didn't open until 10:00 so we decided to feed the birds in the Aviary, see the bats, and then see the butterflies. 

This time Ryan had a fun cockatiel that landed on his shoulder and ate his stick, but then I think it nipped at his finger, and that was the end of that.  The nectar he fed the other birds lasted about 10 seconds and it was gone.  By the time I was done paying and going to see where he went, he said his food was gone.  So the next stop was the butterflies. 

We got to see one whole butterfly emerge from his cocoon, which was cool.  They come out quick once they decide to come out!

I love this picture of the butterflies we saw up close. 

The lady working there was trying to tell Ryan NOT to touch their wings, because the scales would come off and it would make it difficult for them to fly.  But to a 5 year old, all he wanted to do was try to catch one.  Oh well...he tried!  

After there, we went to the paws on area and he had fun with a boy he met named Jerry.  So funny to see kids make fast friends!  He went into the vetinarian area where they can put on coats and pretend to treat sick and injured animals.  I think this picture is so funny - look how he put the stethescope on his head!  I'm not sure if he will make it as a doctor...  lol

Then I took him to the water area where he could cool off.  We were so hot, when we got home, we both went for a swim!  Whew!  Love having a pool during hot days like this.  I think it is in the 90's now, or upper 80's.

On Sunday, we went shopping and took advantage of some Memorial Day weekend specials!  Alivia wanted a new swimsuit...Oh. My. Gosh.  You must have PATIENCE when taking a 12 year old bathing suit shopping!  What a challenge to find the right top to go with the right bottoms!

She ended up with a two piece that had a printed top and a solid bottom that she mixed around.  It did look cute!  Then I said I was going into Ann Taylor Loft, where everything in the store was 40% off, then when you spent over $100, you got a $25 off coupon to use the next week!  WooHoo!  I did a little damage in there, picking up this cute top and a few others:


Monday Alivia had her Swim Team practice.  They meet through all holidays, but luckily her session was only from 9-10, so afterwards we met up with Rick and the other kids out on the beach.  They said there was parking (Tables beach area) available but by the time we got there, the parking lot was full and people were parking on the grass.  We were there with the Hendricksens and the Loa's, and saw MANY MANY locals there as well!  Fun, fun!!  I brought some chicken, chips and grapes to eat for lunch. 

The water was choppy and there were a lot of surfers out. We came back home around 1:30, went for a swim, and had an old fashioned Memorial Day Bar-b-que! We had hamburgers, I made my broccoli slaw and macaroni salad, then our friends next door brought over hotdogs, potato salad and chips.  Rick made some refreshing frozen margaritas and the kids swam...and all was well with the world.  It is so nice to enjoy a nice relaxing 3 day weekend!

My friend Jennifer over at Hope Studios posted this macaroni salad and I made it yesterday for the barbecue.  It does have a taste like devilled eggs.  With horseradish and hot sauce in the recipe, I knew the Rocket Scientist would love to eat it!  A different recipe from the sweeter kind my mom used to make, but it was good!  College boy loved it because there was no milk in it, and the Rocket Scientist said it was good but he would have liked more hot sauce!


Here it is from Jennifer's site:

Juniper's Macaroni Salad


Ingredients:

1 lb box macaroni (any shape is fine)
1 dozen eggs, hard boiled and shelled (I used 8)
1 cup diced celery
1/2 cup diced sweet onion
2 1/2 cups Hellmann's mayonnaise (I used low fat Hellmann's)
1 T. yellow mustard
1 T. horseradish (secret ingredient!)
1 t. celery seed
2 t. salt
1 t. pepper
2 t. Frank's Red Hot Sauce (secret ingredient!)

Cook macaroni according to directions, drain and let cool. Meanwhile, mix mayo, mustard, celery seed, horseradish, salt, pepper and hot sauce. Cut eggs in half and reserve yolks in a separate bowl. Cut the whites into large chunks and add to the macaroni along with celery and onion. Mash yolks and add to the mayonnaise mixture.You get a nice, rich dressing that is reminiscent of deviled eggs. Combine the wet and dry ingredients and sprinkle with paprika. Taste and adjust seasonings. You may like yours wetter and you can add more mayo at this point.

Friday, May 28, 2010

Slow Cooker Southwest Chicken

A meal fit for any College Boy!  And it is lactose free!  I came across this recipe the other day at the Pioneer Woman's Tasty Kitchen website.  Anything that I think the family will like, plus be able to make it in a slow cooker?? Well, that is a major plus in my book.  I LOVE my Crock Pot!  This old thing has been going strong for almost 25 years. Can you see it to the right in the above photo?  I hear the new ones now have a timer on them, which would be great, but as long as my dinosaur is still working, I'm using it! 

3 out of 4 loved it,but the 5 year old thought it was a little too spicy. We also had it with some White Mountain Publix bread.  College Boy is spreading his butter on a piece above.

This shows how the two oldest kids had NO TROUBLE cleaning their plates!
And mix it with table conversation?  Priceless!  This recipe is definitely a keeper!


Slow-Cooked Southwest Chicken

Added by musingsfromthekitchen on December 16, 2009 in Main Courses, Slow Cooker

Prep Time 10 Minutes
Cook Time 6 Hours Servings 6 Difficulty Easy

Ingredients

30 ounces, weight Canned Black Beans, Rinsed And Drained
14-½ ounces, fluid Reduced Sodium Chicken Broth
14-½ ounces, weight Canned Diced Tomatoes With Green Chilies
1½ pounds Chicken Breast
16 ounces, weight Salsa
1 cup Frozen Corn
1 Tablespoon Dried Parsley
1 teaspoon Cumin
¼ teaspoons Pepper
Salt To Taste
Hot Rice, To Serve
Preparation Instructions

In a 2-3 quart slow cooker, combine the beans, broth, tomatoes, chicken, salsa, corn and seasonings. Cover and cook on low for 6-8 hours or until chicken shreds easily. Shred the chicken and return to the slow cooker. Serve with rice.

Wednesday, May 12, 2010

A Mother's Day Dessert from Little Man

For Mother's Day, Little Man wanted to make me a special dessert.  Here he is, describing his concoction in recipe format:

Hi!  Today I wanted to make a special dessert for my mom for Mother's Day, so here it is.  The first thing you do, is get all of your ingredients out.
You start with a chocolate donut.  You have to have one of those.  So after church, we stopped at Target to get a chocolate donut, and also a banana.  It also has a banana in it.  Mom vetoed the grapes idea.  Other ingredients include chocolate syrup, sprinkles, cherries and pretzel sticks.
Start out by slicing up the banana.  Use a knife your mom will let you use with her supervision, and slice them into bite sized pieces.  Next, put it in the bowl along with the chocolate donut.  Squeeze a bottle of chocolate syrup all over the banana.  Mom says not to get too carried away with the syrup!  Take a spoonful or two of sprinkles, any kind, and sprinkle them over the chocolate syrup so it sticks.
Next get out the whipped cream.  Oh, see how I just used half of the donut?  The other half will come in later.  You will see!  Now, squirt the whipped cream over the bananas so you have a place to put the cherry and the broken pieces of pretzel on top.
And here it is!!  Present this to your mom BEFORE supper, so she doesn't say she is too full after supper for her dessert.  Mom said this was SO good, she didn't need any supper after she ate this! 
(!!YIKES!!)

And here we are!  Mom is wearing the pendant that my sister picked out for her from us, and the flower pin that I made for her in my preschool class.  And do you see my face??  That is where the other half of the donut comes in.  You get to eat it yourself! 
 I love cooking!
Happy Mother's Day, Mom!
XOXOXOXOXO

Thursday, May 6, 2010

Power Bars Recipe

Last week, the kids' swim teacher had his last day coaching/teaching, so the kids and I decided to make him some Power Bars as a thank you and going away gift.  I had saved this recipe from Heidi Swanson in my archive a couple of years ago, but just recently on another blog I follow, a girl posted it again.  You can find the original recipe here. So Little Man and I went up to the health food store right up the street and bought the ingredients to make them.  They are SO good! I will post the recipe as is, but it would be good to try adding some dried fruit, like dried cranberries, apricots or blueberries to the mix.  Enjoy!!

Big Sur Power Bars

1 tablespoon coconut oil (or regular butter)
1 cup pecans, chopped
1 cup slivered almonds
2/3 cup (unsweetened) shredded coconut
1 1/4 cups rolled oats
1 1/2 cups unsweetened crisp brown rice cereal
1 cup brown rice syrup
1/4 cup natural cane sugar
1/2 teaspoon fine-grain sea salt
2 tablespoons ground espresso beans (I did not have this so we didn't put it in)
1 teaspoon pure vanilla extract

Preheat oven to 350 degrees. Grease a baking pan with the coconut oil. If you like thick power bars, opt for an 8 by 8-inch pan; for thinner bars, use a 9 by 13-inch pan.


On a rimmed baking sheet toast the pecans, almonds, and coconut for about 7 minutes, or until the coconut is deeply golden. Toss once or twice along the way. Mix the oats, toasted nuts, coconut, and the cereal, together in a large bowl and set aside.

Combine the rice syrup, sugar, salt, espresso, and vanilla in a small saucepan over medium heat and stir constantly as it comes to a boil and thickens just a bit, about 4 minutes. Pour the syrup over the oat mixture and stir until it is evenly incorporated.

Spread into the prepared pan and cool to room temperature before cutting into whatever size bars you desire.    Makes 16 to 24 bars.


I am linking this post over here: